Getting Started#
Using dysh at GBO#
If you have access to a GBO data reduction host (e.g., fourier, thales, etc.), then you should be able to launch the latest version of dysh from a terminal by typing
dysh
The first time you run this, it may take a minute. To verify you are getting the latest version, check the output of these commands:
which dysh
Should print: /opt/local/bin/dysh. And
dysh --version
Should print 0.7.0 or higher (e.g., 0.7.1).
If you want to install your own version of dysh instead, read the following section.
Installing dysh#
dysh requires a Python version between 3.10 and 3.12 (dysh has not been tested in Python 3.13 or above) and recent versions of
astropy,
numpy,
scipy,
pandas,
specutils, and
matplotlib.
We strongly recommend the use of a virtual environment for installing dysh.
Linux and MacOS#
The details of how to install dysh on your own depend on what package manager you use (e.g., uv, conda, pip).
We strongly recommend that you install dysh in a separate Python environment, so you do not change your system Python (if you use your own anaconda3, you can of course do anything you like, though we still recommend a virtual environment).
It is important to note that the latest version of dysh will only work on Python versions between 3.10 and 3.12 (dysh has not been tested on Python 3.13 or above).
Here we provide a few examples, which require the ability to install Python packages in your system.
If you use conda, then you can use the following commands
Create a dedicated virtual environment for
dysh, with Python 3.12 (you could use a Python version between 3.10 and 3.12)conda create -n dysh-venv python==3.12
Activate the newly created virtual environment
conda activate dysh-venv
Install
dyshinto the environmentpip install "dysh[nb] @ git+https://github.com/GreenBankObservatory/dysh"
dyshshould now be available through thedyshcommand. You can make sure you installed the latest version by runningdysh --versionIt should print
0.7.0or higher (e.g.,0.7.1).
If you already have Python 3.10, up to 3.12, installed you can create a new virtual environment using venv.
Create a dedicated virtual environment for
dysh, with Python 3.12:python3.12 -m venv dysh-venv
Having
python3.12available as above may change depending on your own system. Make sure you are using a Python version between 3.10 and 3.12 withpython --version.Activate the newly created virtual environment
pip install "dysh[nb] @ git+https://github.com/GreenBankObservatory/dysh"
dyshshould now be available through thedyshcommand. You can check what version you installed by running:dysh --versionIt should print
0.7.0or higher (e.g.,0.7.1).
If you use uv then the following command will install dysh:
uv tool install "dysh[nb] @ git+https://github.com/GreenBankObservatory/dysh"
dysh should now be available through the dysh command. You can check what version you installed by running:
dysh --version
It should print 0.7.0 or higher (e.g., 0.7.1).
Warning
Installing dysh using this method will install it as a tool, not a package, so it won’t be possible to import dysh from a Python session.
At GBO, on a linux machine from the terminal (assumes you’re using bash).
First, create a new Python virtual environment. For this example we will use Python 3.11 (you can change the Python version, but the latest
dyshwill only work on Python between 3.10 and 3.12):/users/gbosdd/python/bin/python3.11 -m venv /home/scratch/$USER/dysh-env
Activate the virtual environment:
source /home/scratch/$USER/dysh-env/bin/activate
Install
dysh, and the additional dependencies to run Jupyter lab:pip install "dysh[nb] @ git+https://github.com/GreenBankObservatory/dysh"
If you do not want the additional dependencies, remove the [nb] part.
Check what
dyshversion was installed:dysh --versionIt should show
0.7.0or higher (e.g.,0.7.1), if using Python between 3.10 and 3.12 (to check the Python version usepython --version).Launch the command line interface
dysh
or the Jupyter lab interface (only available if you used the [nb] option, or if you installed Jupyter lab)
dysh-lab
Windows#
We provide instructions on how to install the latest version of dysh on Windows using anaconda and git.
Anaconda provides a way of installing Python and managing virtual environments, and git is used to download, and install, the source code for the latest version of dysh.
If you want to install the latest stable version of dysh, then it is not necessary to use git.
The first step is to download and install Anaconda and
git. Anaconda comes in two flavors, as Anaconda distribution or as Miniconda. The Anaconda documentation provides details on the differences between both (link), but the short story is that Anaconda has a graphical user interface (GUI), it comes with more packages pre-installed, but it uses more disk space. Miniconda does not have a GUI and it comes with less packages pre-installed. Both provide access toconda, which is the tool we will use to create a new virtual environment. You can find the downloads for Anaconda distribution and Miniconda here.gitcan be downloaded here.gitis highly customizable, so it will ask a bunch of questions during the installation. For our purposes, the defaults should work. The most important part is to havegitavailable through the command line (e.g., PowerShell).After installing Anaconda or Miniconda, there should be an Anaconda menu in the start menu.
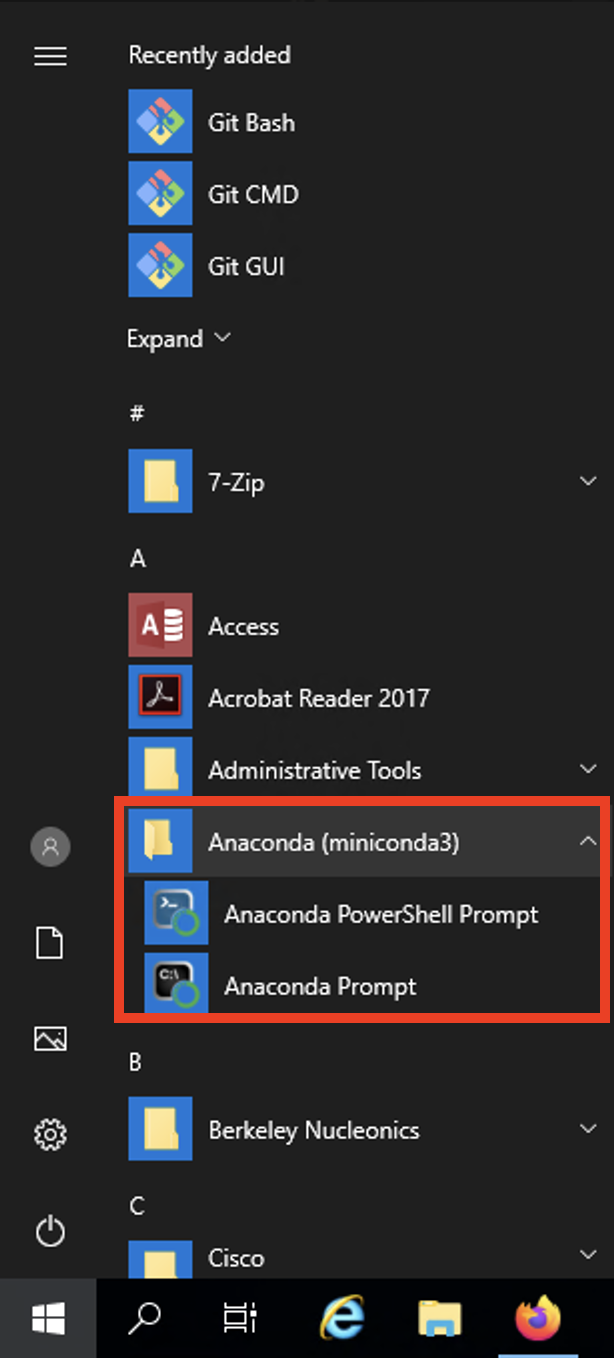
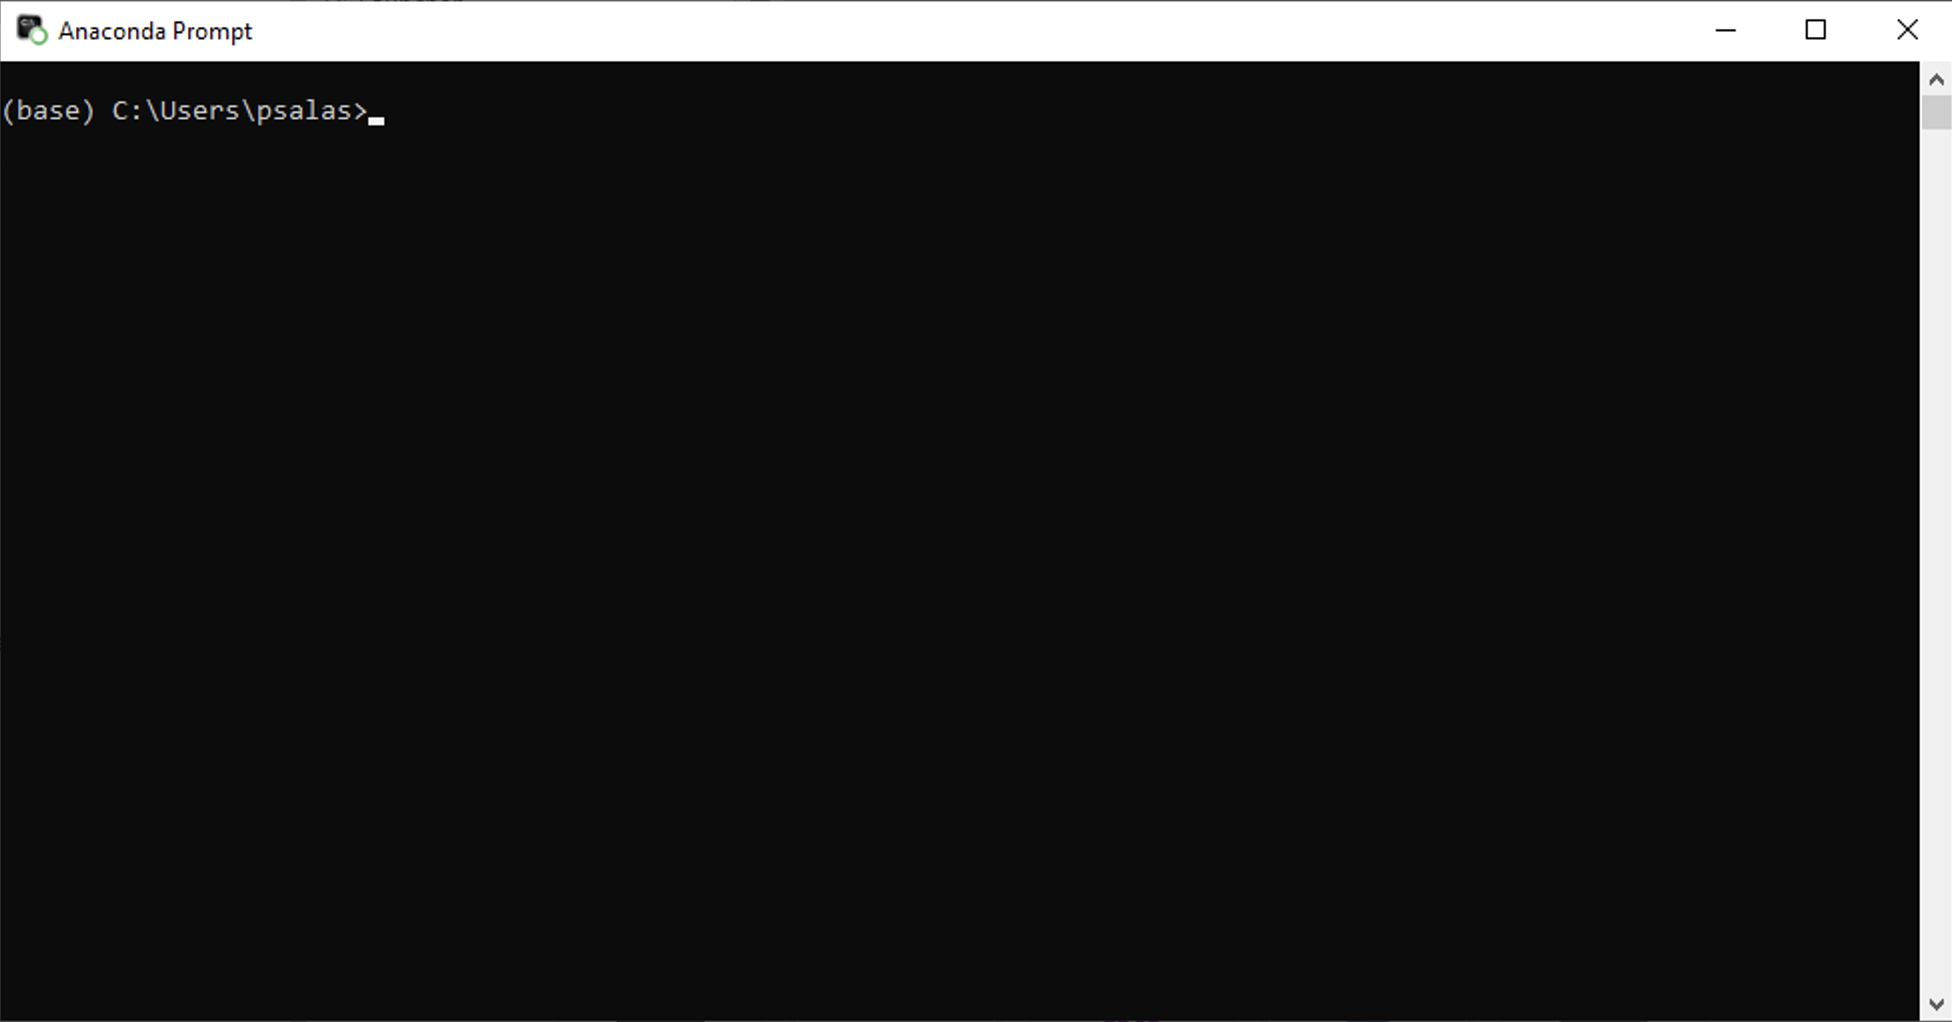
In the dropdown select either the Anaconda Prompt or the Anaconda PowerShell Prompt. This will launch a new terminal with the base virtual environment activated.
In the terminal enter the following command
conda create -n dysh-venv python==3.10
This will create a new virtual environment with
Python3.10. You can use other versions ofPython, but not lower than 3.10 nor above 3.12.dyshhas not been tested withPython3.13 and above. You can check thePythonversion using the commandpython --versionin the terminal.After creating the environment, activate it. Enter the following command
conda activate dysh-venv
If everything went well you should see that the command line prompt now says
(dysh-env)at the start of the current line.Install
dysh, with all the dependencies required to run a Jupyter lab server (not required). Enter the following commandpip install "dysh[nb] @ git+https://github.com/GreenBankObservatory/dysh"
This will download and install
dyshwith all its dependencies to thedysh-envvirtual environment. Depending on your internet connection, this may take a while. If you do not want the extra dependencies, remove the[nb]part in the command.If everything went well, the following commnad should print the
dyshversiondysh --version
This should print
0.7.0or above (e.g.,0.7.1).Launch the command line interface
dyshor the Jupyter lab interface (only available if you used the [nb] option, or if you installed Jupyter lab)
dysh-labThe Jupyter lab interface will launch in your default browser, unless you have changed the Jupyter settings. You can avoid launching a browser with the
--no-browseroption, so the command would bedysh-lab --no-browser
Then you can copy and paste the url in your preferred browser.
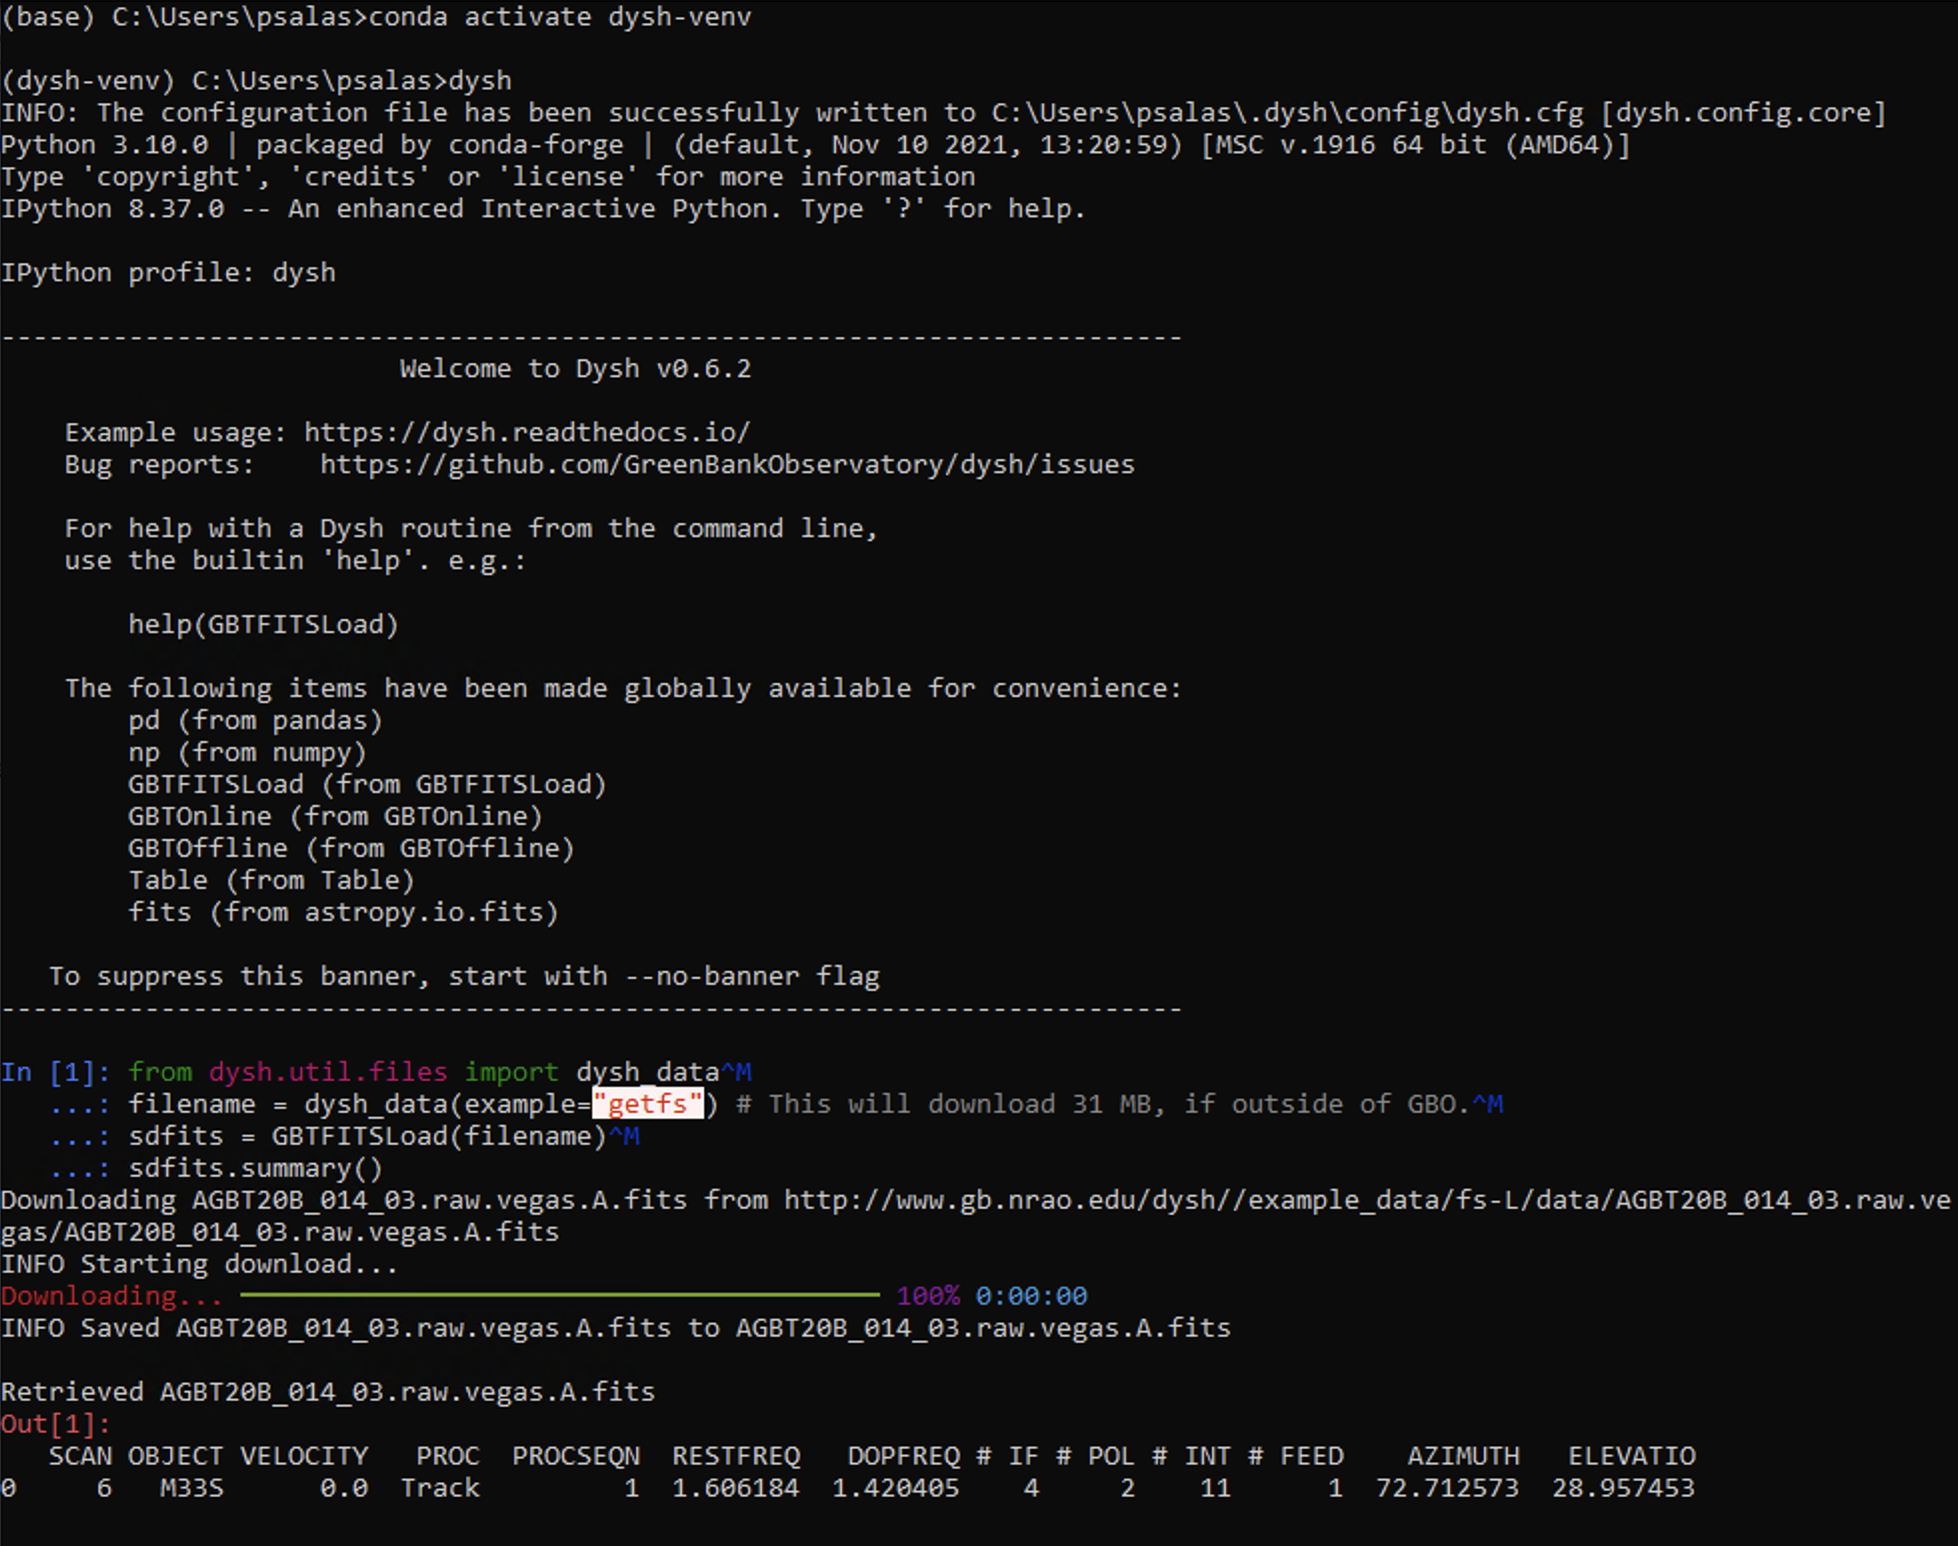
Quick Test#
After installing dysh you can run the following commands to make sure everyhting is working fine.
This quick example will download a 31 MB file to the current directory.
Launch
dyshdysh
Copy and paste the following
from dysh.util.files import dysh_data
filename = dysh_data(example="getfs") # This will download 31 MB, if outside of GBO.
sdfits = GBTFITSLoad(filename)
sdfits.summary()
This should look like